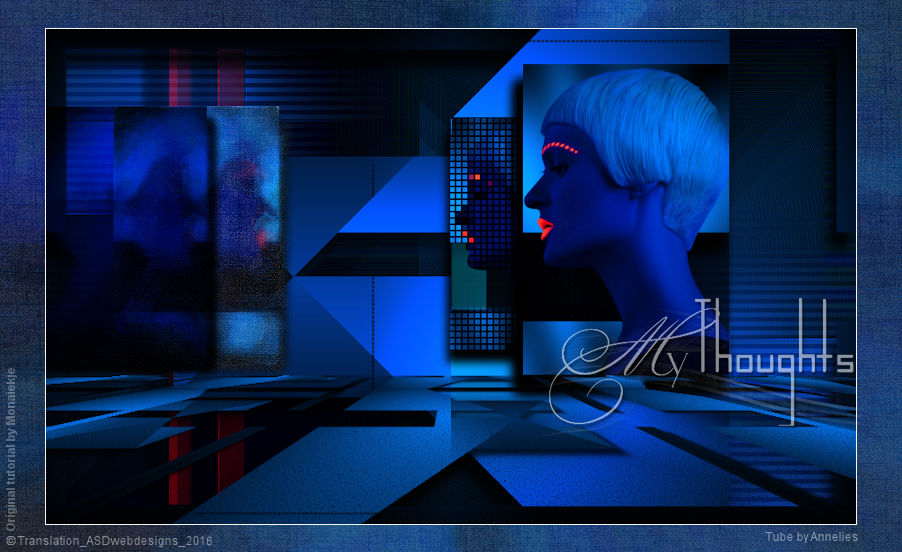
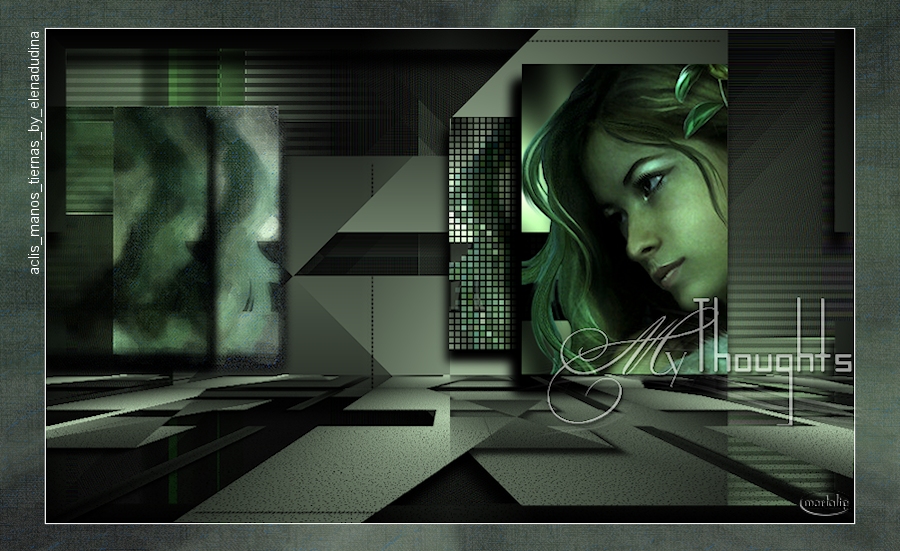
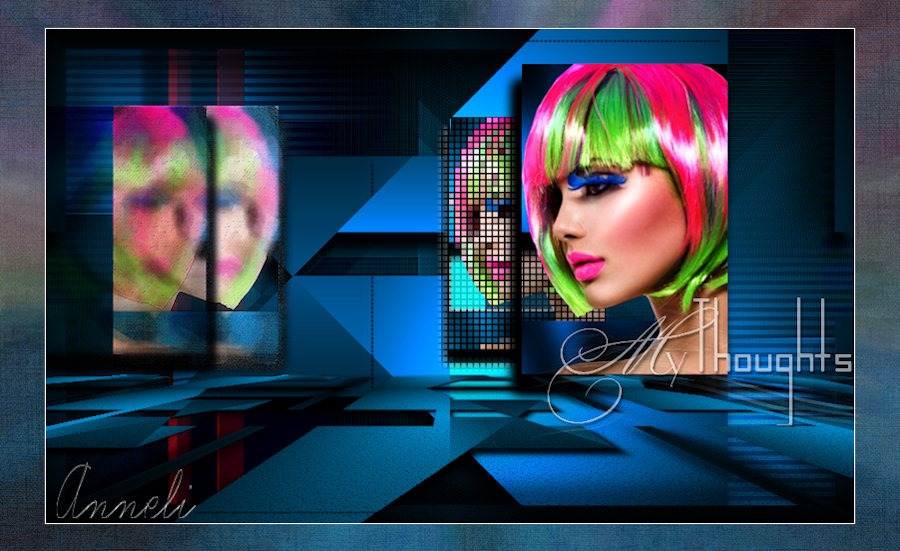
The tutorial:
01
Open a
new transparent image of 900 x 550 px
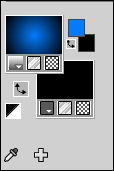
Fill with the
Backgroundcolor  (Right Mouse Click)
Layers - New
Raster Layer
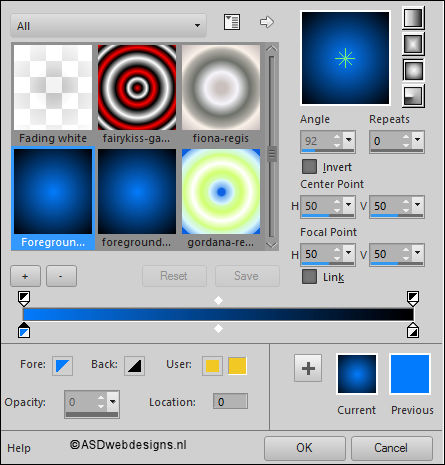
Fill with the Gradient

Effects - Edge
Effects - Enhance More
Edit - Repeat Enhance Edges
More
Effects - Plugins - Simple - Pizza Slice
Mirror
Edit - Repeat
Pizza Slice Mirror
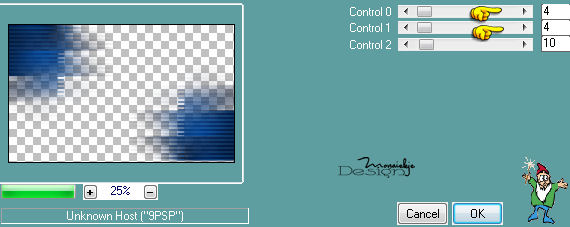
Effects - Plugins - Toadies - What Are
You? - X-dose 20 - Y-dose
20
02
Layers
- New Raster Layer
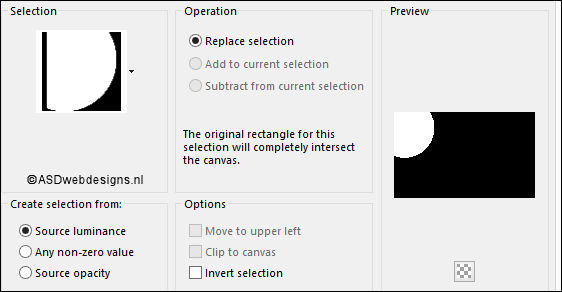
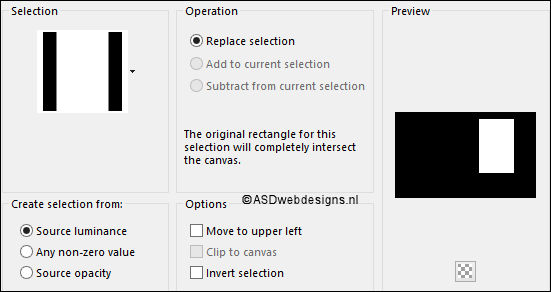
Selections -
Load/Save Selection - Load Selection From Disk -
MDlessen-selectie104
Fill the
Selection with the Gradient
Selections -
Select None
Adjust - Blur -
Gaussian Blur - 40
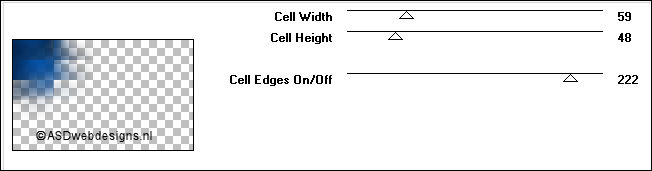
Effects - Plugins - Toadies - Weaver
03
Layers -
Duplicate
Image - Mirror -
Mirror Horizontal ( Image - Mirror in previous PSP
Versions)
Image - Mirror -
Mirror Vertical ( Image - Flip in previous PSP Versions)
Layers - Merge -
Merge Down
Effects - Edge
Effects - Enhance
Effects - Plugins
- Carolaine and Sensibility - CS-Hlines
04
Layers -
Duplicate
Layer Palette -
Double click on this Layer and set the Blend Mode to
Dodge"
Layers - Merge - Merge all
(Flatten)
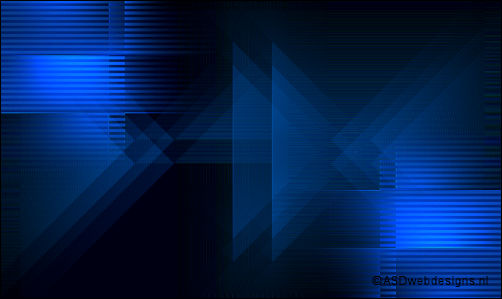
Your work looks like this
now:
05
Layers - New
Raster Layer
Fill with the
Gradient
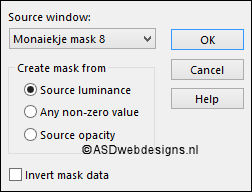
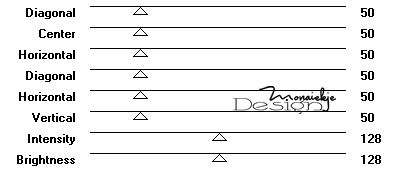
Layers - New Mask Layer - From Image
- Monaiekje mask 8 - Source
luminance Checked - Invert mask data
NOT checked
Layers - Merge - Merge Group
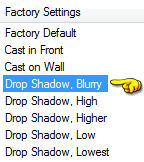
Effects - Plugins - Alien Skin Eye Candy
5 - Impact - Perspective Shadow
- Settings Tab:
Preset Dropshadow,
Blurry
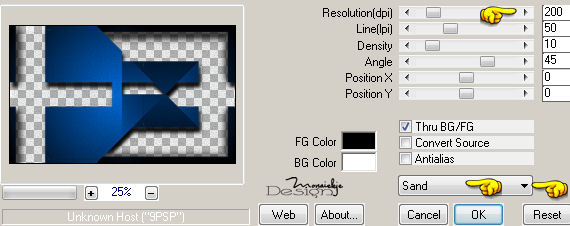
Effects - Plugins
- Simple - Pizza Slice Mirror
Effects - 3D Effects - Drop Shadow -
Vertical 20 -Horizontal
Minus 8 - Opacity
100 - Blur -20 -
Color - #000000 .jpg)
06
Layers -
Duplicate
Image - Mirror -
Mirror Horizontal ( Image - Mirror in previous PSP
Versions)
Effects - Plugins - MuRa's Meister -
Tone
Effects
- Plugins - MuRa's Meister - Perspective
Tiling

07
Layer Palette - Click on the Middle
Layer (Group - Raster 1)
Layers -
Duplicate
Layer Palette - Double click on this Layer and set the
Blend Mode to
"Dodge"
08
Selections -
Load/Save Selection - Load Selection From Disk -
MDlessen-selectie105
Selections -
Promote Selection to Layer
Effects - Plugins
- Graphics Plus - Cross Shadow - Default Settings
Keep Selected
09
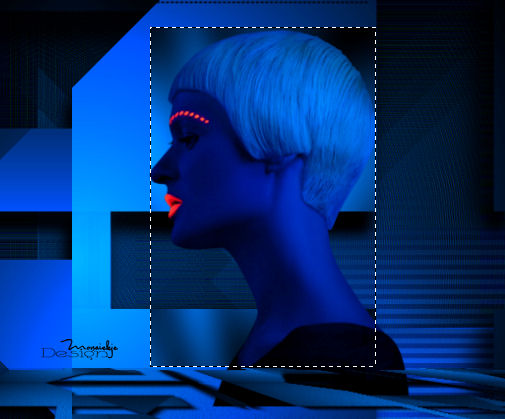
Maximize Tube
"Alies 11VR67-woman-04122012" from
tray
Edit - Copy
On your work image: Edit - Paste
As New Layer
Image - Resize
- 60% - Resize all Layers
not checked
Afbeelding -
formaat wijzigen - 60%
Move into the Selection like
this:
Selections -
Invert
Edit - Cut (Or hit the Delete Key of your
Keyboard) 
Selections -
Invert
Effects -
3D Effects - Drop Shadow - Vertical 20 -Horizontal
Minus 8 - Opacity 100 - Blur
-20 - Color - #000000
Selections - Select None
Layers -
Merge - Merge Down
10
Layers -
Duplicate
Image - Mirror -
Mirror Horizontal ( Image - Mirror in previous PSP
Versions)
Image - Resize - 80% - Resize all
Layers not checked
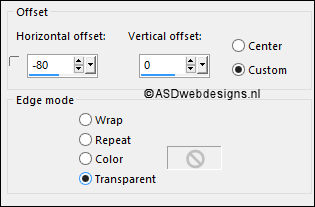
Effects -
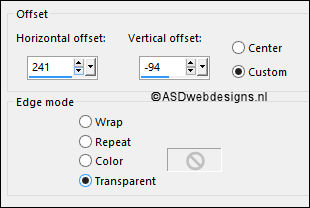
Image Effets - Offset

Effects - Plugins
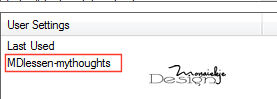
- Alien Skin Snap Art - Oil Paint
- Settings Tab:
Preset
MDlessen-mythoughts
Adjust - Sharpness -
Sharpen
Edit - Repeat
Sharpen
11
Layers -
Duplicate
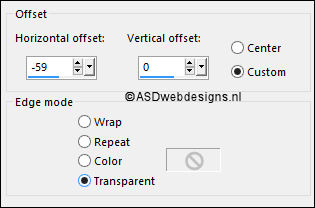
Effects - Image
Effets - Offset
Layer Palette
- Double click on this Layer and set the Blend Mode to
"Multiply"
12
Layer Palette - Click on the Fourth Layer from the Top
(Promoted Selection)
Layers -
Duplicate
Image - Resize - 75% - Resize all
Layers not checked
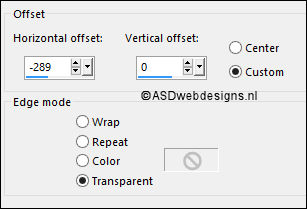
Effects -
Image Effets - Offset
Effects - Plugins
- Tymoes - Gridmaker
Layers -
Arrange - Move Down
13
Layer Palette - Click on the Fourth Layer from the Top
(Promoted Selection)
Layers -
Duplicate
Layer Palette
- Double click on this Layer and set the Blend Mode to
"Multiply"
14
Layer Palette - Click on the Bottom
Layer
Maximize Tube
"deco1 my thougts MD" from tray
Edit - Copy
On your work image: Edit - Paste
As New Layer
Effects - Image
Effets - Offset
Layer Palette -
Double click on this Layer and set the Blend Mode to "Hard
Light" and the Layer Opacity to
55
15
Color Palette: Set
the Foreground Gradient back to color and change to #ffffff

Image - Add Borders - Symmetric
checked - 1 px -
Foregroundcolor
Layers -
Duplicate
Image - Resize - 90% - Resize all
Layers not checked
Layer Palette - Click on the Bottom
Layer
Adjust - Blur - Radial Blur
Effects - Plugins
- Alien Skin Snap Art - Oil Paint
- Settings Tab:
Preset
MDlessen-mythoughts
16
Layer Palette - Click on the Top
Layer
Maximize Tube
"MD tekst my thougts" from tray
Edit - Copy
On your work image: Edit - Paste
As New Layer
Effects - Image
Effets - Offset
Adjust - Sharpness
- Sharpen
Layer Palette -
Double click on this Layer and
set the Opacity of
this Layer to 55
Layers -
Merge - Merge all (Flatten)
17
Image - Resize -
Width 900 Pixels - Resize all Layers
checked
Add your name or
watermark, save as JPG file and you're
done!
If you wish you
can post your result on my Face book Page