The tutorial:
01.
Open a new transparent image of 900 x 600
px
Selections - Select all
Open
Tube "kittys-yellowcoupe"
Edit - Copy
On your work image: Edit -
Paste Into Selection
Selections - Select
none
Image - Flip
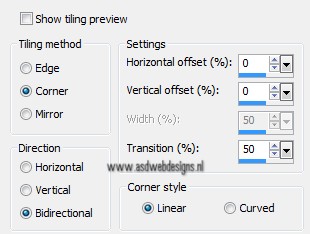
Effects - Image Effects - Seamless
Tiling
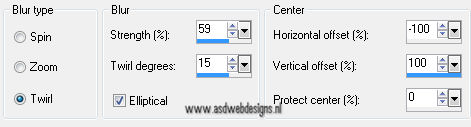
Adjust - Blur -
Radial Blur
02.
Layers
- Duplicate
Image
- Mirror
Image
- Flip
Layers - Merge - Merge Down
Layers -
Duplicate
Image
- Mirror
Layers
- Merge - Merge Down
Image
- Mirror
03.
Effects - Plugins - Toadies -
Weaver
Effects - Plugins - Toadies -
What Are You? - X-dose 20 -
Y-dose 20
Effects - Image Effects - Seamless
Tiling
Effects
- Edge Effects - Enhance More
Layers
- Duplicate
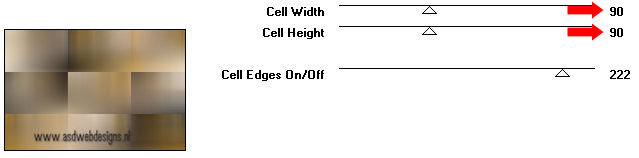
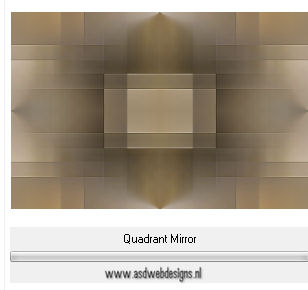
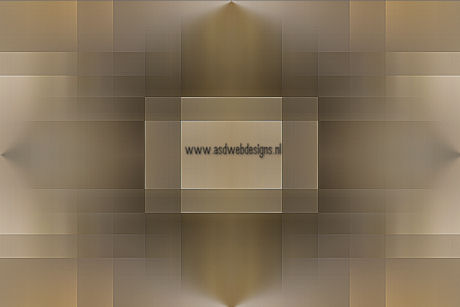
Effects - Plugins - <I.C.NET
Software> - Filters Unlimited 2.0
- Tile & Mirror -
Quadrant Mirror
(no settings available)
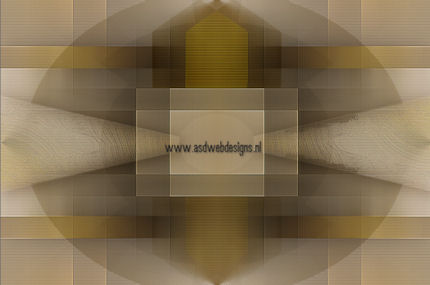
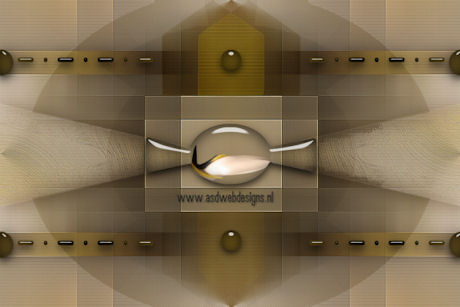
Your
work looks like this now
04.
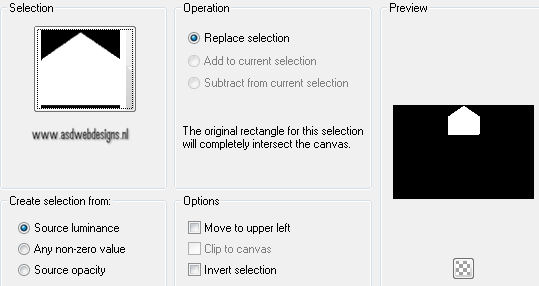
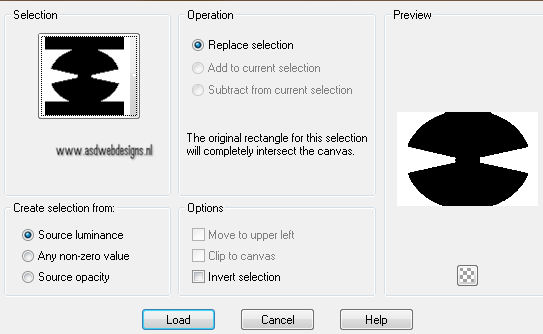
Layers - New Raster Layer
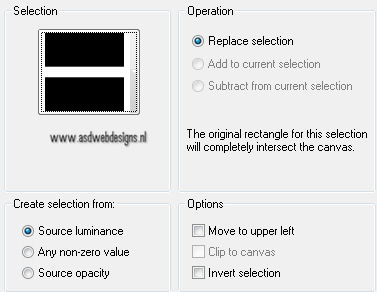
Selections - Load/Save Selection - Load
Selection From Disk -
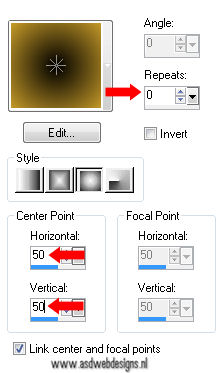
Msb_Sel_Prashanti_01
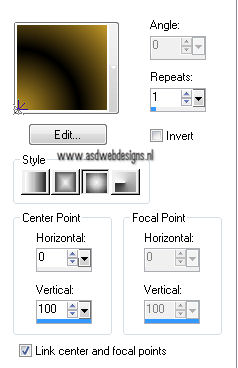
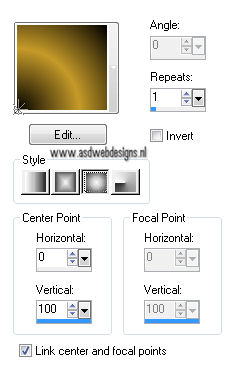
Color Palette: Set your Foregroundcolor to
Foreground/Background Gradient
(Corel_06_029) - Style: Sunburst
Fill
the Selection with the Gradient 
Adjust
- Blur - Gaussian Blur - 35
Selections
- Select none
Effects - Texture Effects - Blinds - Color:
Foregroundcolor
Effects - Plugins - Toadies -
What Are You? - X-dose 20 -
Y-dose 0
Effects - Edge Effects - Enhance
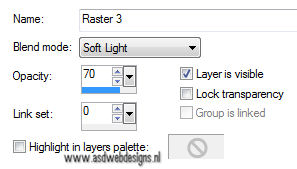
Layer Palette -
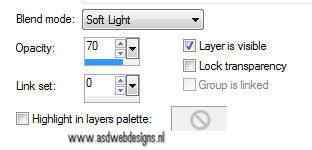
Double click on this Layer and set the Blend
Mode to "Soft
Light"
05.
Layers
- Duplicate
Image
- Flip
Layers
- Merge - Merge Down
06.
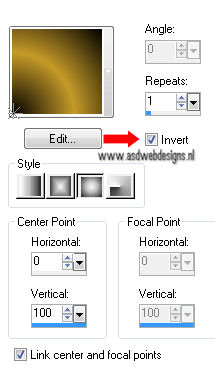
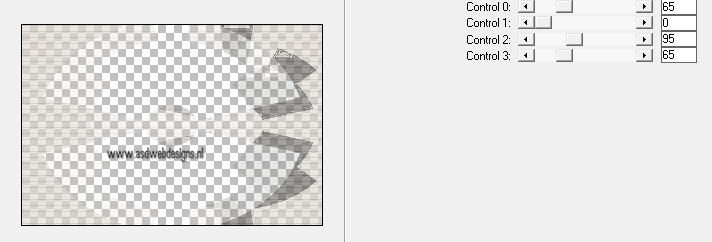
Color Palette: Check the invert box on your
Gradient
Layers - New Raster Layer
Selections - Load/Save Selection - Load Selection From Disk -
Msb_Sel_ Prashanti_02
Fill
the Selection with the Gradient 
Adjust
- Blur - Gaussian Blur - 35
Selections - Select
none
Effects - Distortion Effects - Wind - From
Left checked - Wind Strength:
100
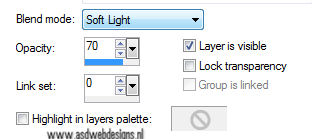
Layer Palette -
Double click on this Layer and set the Blend
Mode to "Soft Light"
and the Layer Opacity to 70
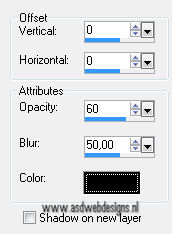
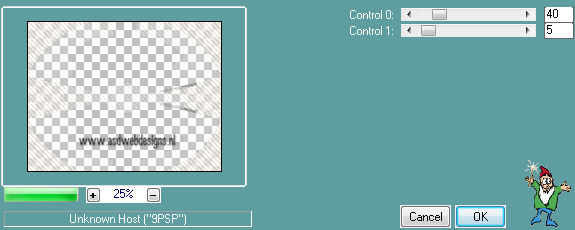
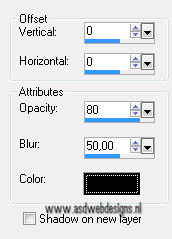
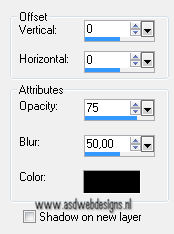
Effects 3D Effects - DropShadow
- Color: #000000 
Effects - Plugins - Simple - Top
Left Mirror
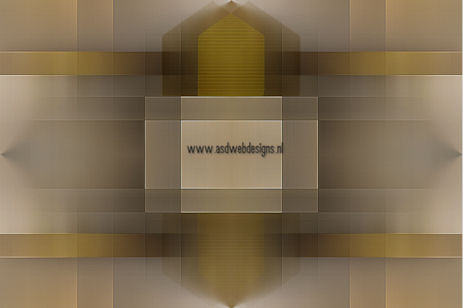
Your work looks
like this now
Go back to Tube "kittys-yellowcoupe"
Edit - Copy
On your work image: Edit -
Paste As New Layer
Image - Resize - 80% - Resize all
layers not checked
Effects
- Plugins – Flaming Pear – Flexify 2 - Click on the Red Arrow
 and load Preset
"Msb_Setting_FP_Flower"
and load Preset
"Msb_Setting_FP_Flower"
Image - Resize - 60% -
Resize all layers not checked
Image - Free Rotate - Left -
90°
EDIT - CUT
EDIT - PASTE AS NEW
IMAGE
Set aside for now and go back
to your main image
08.
Layer Palette: Change your
Foregroundcolor to
#dfd9d1 
Your on the empty layer
now.
Fill with the Foregroundcolor
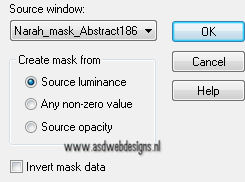
Layers - New
Mask Layer - From Image -
Narah_mask_Abstract186
Layers - Merge -
Merge Group
Selections - Load/Save Selection - Load Selection From Disk -
Msb_Sel_ Prashanti_03
Effects - Plugins –
Carolaine and Sensibility – CS_Halloween
2
Effects
- Edge Effects - Enhance
Layer Palette -
Double click on this Layer and set the Blend
Mode to "Soft Light"
and the Layer Opacity to 70
Keep selected!
09.
Layer
Palette: Set your Foregroundcolor back to
#c59a29

Selections - Invert
Selections - Promote Selection to
Layer
Fill the Selection with the
Foregroundcolor
Effects - Plugins – Carolaine and Sensibility –
CS_DLines
Effects
- Edge Effects - Enhance
Selections
- Select none
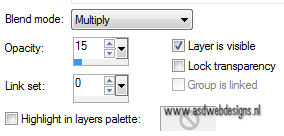
Layer Palette -
Double click on this
Layer and set the Blend Mode to
"Multiply" and the Layer Opacity to
15
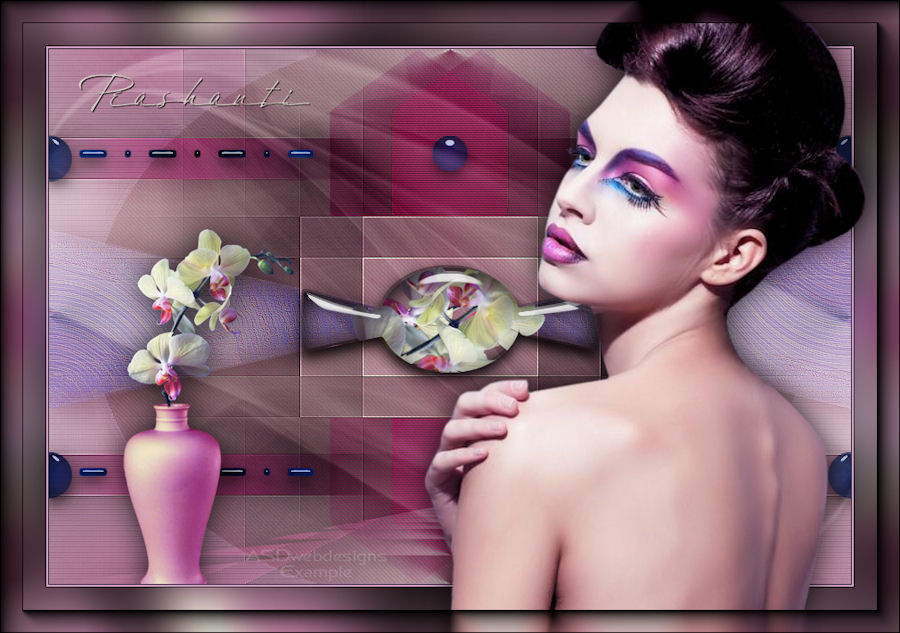
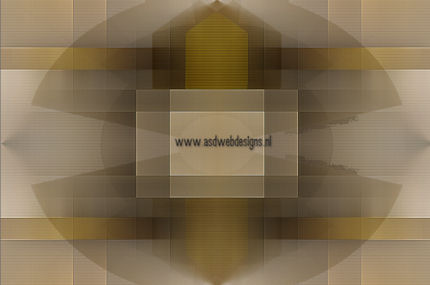
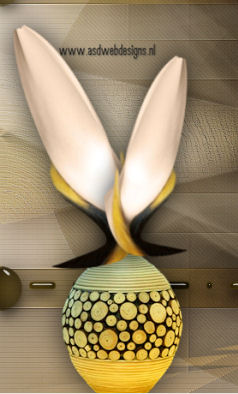
Your work looks like this now:
10.
Layer
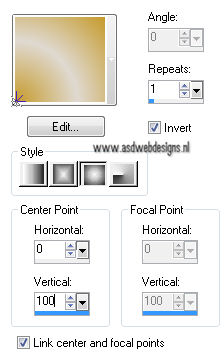
Palette: Set your Foregroundcolor to #dfd9d1 and your Backgroundcolor to #c59a29
Set your
Foregroundcolor to Foreground/Background Gradient
(Corel_06_029) - Style: Sunburst
Layers - New Raster Layer
Selections -
Load/Save Selection - Load Selection From Disk - Msb_Sel_
Prashanti_04
Fill the Selection with the Gradient 
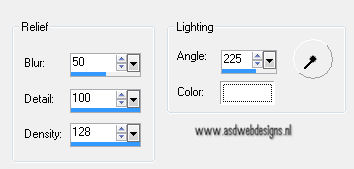
Adjust - Blur - Gaussian Blur - 15
Effects - Artistic Effects - Enamel - Color
#ffffff
Selections -
Select none
11.
Layers
- Duplicate
Image
- Mirror
Image
- Flip
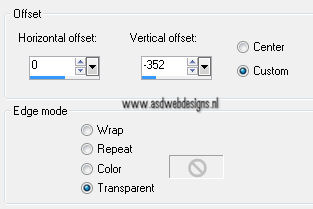
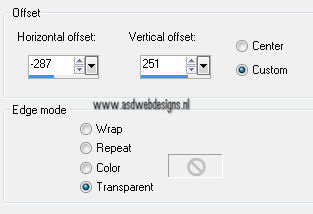
Effects
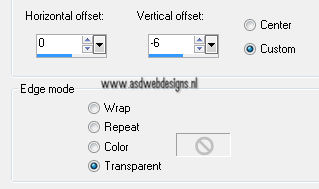
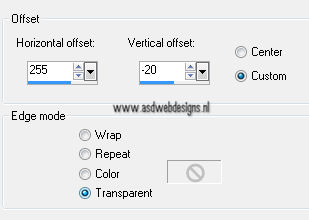
- Image Effects - Offset
Layers - Merge - Merge Down
Effects - Edge Effects -
Enhance
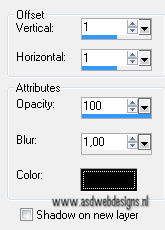
Effects 3D Effects -
DropShadow - Color: #000000
Effects - Plugins - Alien Skin Eye
Candy 5 - Impact - Perspective
Shadow - Settings Tab: Dropshadow,Blurry.
Layer Palette -
Double click on this Layer and set the Blend
Mode to "Soft Light"
and the Layer Opacity to 70
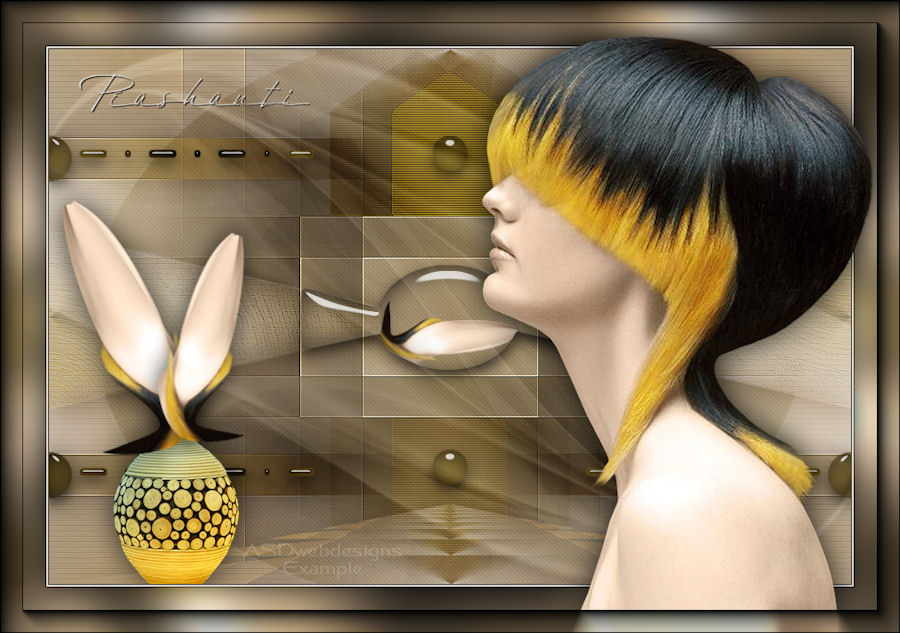
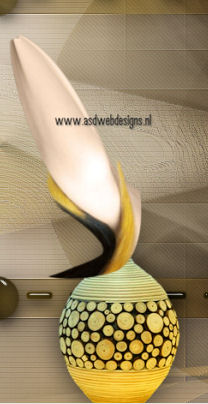
Your work looks like this now:
12.
Go back to the Image you have set
aside. 
On this image: Image - Rotate
Right
Edit - Copy
Edit - Undo Rotate
Right
Minimize to tray again, do not close
we need it again...
Go back to your Main
image
Selections - Load/Save Selection
- Load Selection From Disk -
Msb_Sel_ Prashanti_05
Edit
- Paste as New Layer (Image is still
in your PSP Memory)
Image - Resize - 31% - Resize all
layers not checked
Effects - Plugins - Alien Skin Eye
Candy 5 - Impact - Glass -
Settings Tab: Preset
Msb_Preset_AS_Gl_27-4-13
Selections - Select
none
13.
Layer Palette: Set your Foregroundcolor back to Color and change
to to #000000
Set your Foregroundcolor again to
Foreground/Background Gradient
(Corel_06_029) - Style:
Sunburst
Layers
- New Raster Layer
Selections
- Load/Save Selection - Load Selection From Disk - Msb_Sel__
Prashanti_06
Fill
the Selection with the Gradient 
Adjust
- Blur - Gaussian Blur - 20
Effects - Plugins - Alien Skin Eye
Candy 5 - Impact - Glass -
Settings Tab: Preset
Msb_Preset_AS_Gl_27-4-13
Selections
- Select none
14.
Layers
- Duplicate
Image
- Mirror
Layers - Merge - Merge Down
Layers - Duplicate
Effects - Image Effects - Offset
Layers - Merge - Merge Down
Effects 3D Effects -
DropShadow - Color: #000000
Your work looks like this
now:
15.
Layers
- New Raster Layer
Selections
- Load/Save Selection - Load Selection From Disk - Msb_Sel__
Prashanti_07
Fill
the Selection with the Gradient
Adjust
- Blur - Gaussian Blur - 20
Effects - Plugins - Alien Skin Eye
Candy 5 - Impact - Glass -
Settings Tab: Preset
Msb_Preset_AS_Gl_27-4-13
Selections
- Select none
Layers - Duplicate
Effects
- Image Effects - Offset
Layers - Merge - Merge Down -
REPEAT ONCE
Effects
3D Effects - DropShadow - Color: #000000
Layer Palette: Change the
Gradient
settings:
Pen Tool  -
Mode: Draw Lines and Poly
Lines - Create as Vector
checked - Linestyle
Long-Short-Dash
(Corel13_024) - Width
10
-
Mode: Draw Lines and Poly
Lines - Create as Vector
checked - Linestyle
Long-Short-Dash
(Corel13_024) - Width
10
Holddown your Shift Key and
draw with your Foreground Gradient
 a line like
this:
a line like
this:
Layers - Convert to Raster Layer
Effects - Plugins – Simple – Top Left
Mirror
Effects - Plugins - Alien Skin Eye
Candy 5 - Impact - Glass -
Settings Tab: Preset
Msb_Preset_AS_Gl_27-4-13
Effects
3D Effects - DropShadow - Color: #000000
Your work looks
like this now:
17.
Layer Palette: Set your Foregroundcolor back to Color and change
to #dfd9d1
Layers - New Raster Layer
Fill with the
Foregroundcolor
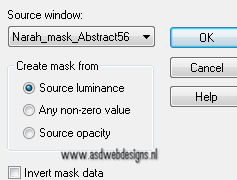
Layers - New
Mask Layer - From Image -
Narah-mask-
Abstract56
Layers - Merge -
Merge Group
Image - Resize -
120% - Resize all layers not
checked
Image - Flip
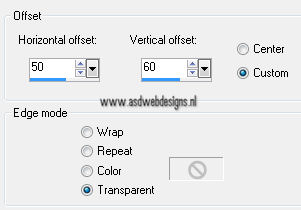
Effects - Image Effects - Offset
18.
Layers - Duplicate
Image - Mirror
Image - Flip
Layers - Merge - Merge Down
Adjust - Sharpness - Sharpen
Effects
3D Effects - DropShadow - Color: #000000
Layer Palette -
Double click on this Layer and set the Blend
Mode to "Soft Light"
19.
Layer Palette - Click on the Second layer from the
bottom
Selections - Load/Save Selection
- Load Selection From Disk -
Msb_Sel_ Prashanti_08
Selections - Promote Selection to
Layer
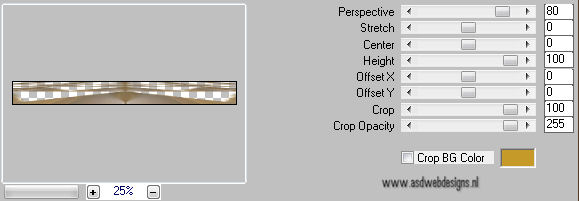
Effects - Plugins - MuRa's Meister -
Perspective Tiling
Selections
- Select none
Effects
3D Effects - DropShadow - Color: #000000
Layer Palette - Click on the top
layer
Open Tube
"tube_nanhoelzle_exclusivo_Deco_17"
Edit -
Copy
On your work image: Edit -
Paste As New Layer
Image - Resize - 75% - Resize all
layers not checked
Effects - Image Effects -
Offset
Adjust - Sharpness - Sharpen
Effects 3D Effects -
DropShadow - Color: #000000
Go
back to the image you have set
aside before
Edit - Copy
On your work image: Edit -
Paste As New Layer
Image - Resize - 60% - Resize all
layers not checked
Image - Free Rotate -
Left - Free - 20°
Move onto the Vase like
this:
Adjust - Sharpness - Sharpen
Effects 3D Effects -
DropShadow - Color: #000000
22.
Layers - Duplicate
Image - Mirror
Image - Resize - 80% - Resize all
layers not checked
Image - Free Rotate - Left - Free -
10°
Move like
this:
Layers - Merge - Merge Down -
REPEAT ONCE
Tip:
If you copy this now and Paste as
new image you can save this as
a tube!
Layers - Merge - Merge all (Flatten)
23.
Layer Palette:
Set your Foregroundcolor to
#000000 and your Backgroundcolor
to #dfd9d1
Image - Add Borders - Symmetric
checked - 1 px - Foregroundcolor
Image - Add Borders - Symmetric
checked - 2 px - Backgroundcolor
Image - Add Borders - Symmetric
checked - 1 px - Foregroundcolor
Selections - Select
all
Image - Add Borders - Symmetric
checked - 50 px - Backgroundcolor
Selections
- Invert
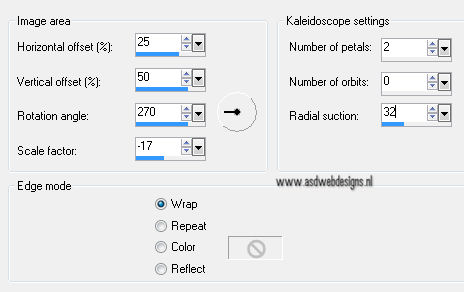
Effects - Reflection Effects -
Kaleidoscope
Adjust
- Blur - Gaussian Blur - 23
Effects
- Plugins – Graphics Plus – Cross
Shadow
Selections - Invert
Effects 3D Effects -
DropShadow - Color: #000000
Selections - Select none
24.
Go back to Tube
"
kittys-yellowcoupe"
Edit - Copy
On your work image: Edit -
Paste As New Layer
Image - Resize -
90% - Resize all layers
not checked
Effects - Image
Effects - Offset
Adjust - Sharpness -
Sharpen
Effects 3D Effects -
DropShadow - Color: #000000
25.
Image - Add Borders - Symmetric
checked - 1 px - Foregroundcolor
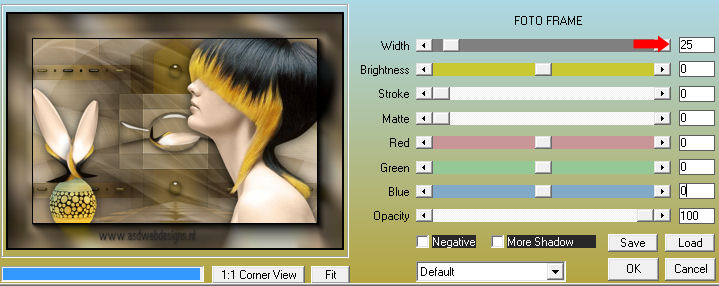
Effects - Plugins – AAA Frames – Foto
Frame
26.
Open Tube
"Msb_Text_Prashanti
"
Edit - Copy
On your work image: Edit - Paste As New
Layer
Effects - Image Effects -
Ofsett
Effects
3D Effects - DropShadow - Color:#000000
27.
Layers -
Merge - Merge all (Flatten)
Image -
Resize - Width 900 Pixels - Resize all layers
checked
Add
your name or watermark, save as JPG file and you're
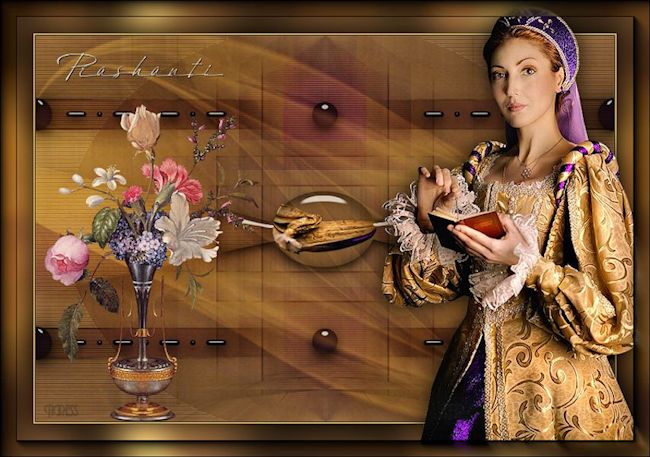
done!
If you wish
you can post your result on my Facebook Page