
01.
Open a new transparent image of 900 x 550
px
02.
Color
Palette: Set your Foregroundcolor to
Foreground/Background Gradient
(Corel_06_029) - Style: Linear
Fill your image
with the Gradient
03.
Layers - New Raster Layer
04.
Selections - Select All
05.
Selections
- Modify - Contract – 75 px
06.
Fill the Selection with the Backgroundcolor
Keep
selected!
07.
Layers
- New Raster Layer
08.
Effects 3D Effects - Cutout - Color #a6c0c1 
09.
Layers - New Raster Layer
10.
Effects 3D Effects - Cutout
- Color #000000 
11.
Selections - Select
None
Your work
looks like this now
12.
Layers - Merge - Merge Down
13.
Effects - Image Effects - Seamless Tiling
14.
Effects 3D Effects - DropShadow - Color - #000000
15.
Layers
- New Raster Layer
16.
Selections
- Select All
17.
Selections
- Modify - Contract – 25 px
18. Open Image
@nn_290412_Paper_Dilan_050_tdstudio
Edit - Copy
On your work
image: Edit - Paste Into Selection
19.
Adjust - Hue and Saturation - Colorize - Hue 129 - Saturation
255
If you you are
using your own colors, choose a brighter color than your
Foregroundcolor, Double click on your Foregroundcolor and pick
one here
20.
Selections
- Select None
21.
Layer Palette - Double click on this Layer and
set the
Layer Opacity of this layer to
27
22. Effects - Plugins – <I.C.NET
Software> - Filters Unlimited 2.0 - &<Bkg Designer
sf10I> - Cruncher
23.
Layers - Duplicate
24.
Effects
- Plugins – VanDerLee Unplugged X – Vertical Tile - Default
settings
25.
Effects - Plugins – <I.C.NET
Software> - Filters Unlimited 2.0 - &<Bkg Designer
sf10I> - Cruncher - Same settings as
before
26.
Layer Palette - Double click on this Layer and
set the Blend Mode to "Multiply"
27.
Layers - Merge - Merge
Down
28.
Layers - Arrange - Move
Down
REPEAT
ONCE
Your work
and your Layer palette look like this now
29.
Selections - Load/Save Selection - Load
Selection From Disk -
MDlessen-selectie121
30.
Selections - Promote Selection to
Layer
31.
Layers
- Arrange - Move Up
32.
Selections
- Modify - Contract – 10 px
33.
Fill
the Selection with the Backgroundcolor 
34.
Selections
- Modify - Contract – 10 px
35.
Edit - Paste Into Selection (Image
@nn_290412_Paper_Dilan_050_tdstudio is still in your PSP
memory)
36. Adjust -
Hue and Saturation - Colorize - Hue 129 - Saturation
255
37.
Effects 3D Effects - DropShadow -
Color - #000000
38.
Selections - Select
None
39. Effects 3D Effects -
DropShadow - Color - #000000
40. Layers -
Duplicate
Image -
Mirror
41.
Layers
- Merge - Merge Down
42.
Layers
- Duplicate
43. Effects -
Image Effects - Seamless Tiling
44. Effects - Texture Effects - Texture
- Canvas Fine
(Corel_15_014)
45.
Layers - Arrange - Move
Down
46.
Adjust
- Blur - Motion Blur
47.
Effects
- Image Effects - Seamless Tiling
48.
Effects - Plugins - L&K
SiteOfWonders - L en K *** – L & K’s
Adonis
49.
Open Tube deco Daisy
MD
Edit -
Copy
On your work
image: Edit - Paste As New Layer
No need to
move
50. Layers - Arrange - Bring to
Top
51.
Layer Palette - Double click on this Layer and set
the Layer Opacity to 70 (The Blend
mode is already on Screen)
Your work and
layer Palette look like this now
52. Open Tube deco 3 Daisy
MD
Edit -
Copy
On your work
image: Edit - Paste As New Layer
53.
Image - Free
Rotate
54.
Effects
- Image Effects - Offset
55.
Layers - Duplicate
Image -
Mirror
56.
Selections
- Load/Save Selection - Load Selection From Disk -
MDlessen-selectie122
57. Layer Palette - Click on the Bottom
layer
58.
Selections - Promote Selection to
Layer
59. Layer Palette - Double click on this Layer and
set the Blend Mode to
"Multiply"
60. Layers -
Duplicate
61. Effects - Texture Effects -
Texture - Canvas Fine
(Corel_15_014)
62. Selections - Select
None
63.
Effects
- Plugins – MuRa’s Meister – Perspective
Tiling
64. Effects -
Edge Effects - Enhance
65.
Open Tube deco 2 Daisy
MD
Edit -
Copy
On your work
image: Edit - Paste As New Layer
66.
Layers -
Arrange - Bring to Top
67.
Image - Free
Rotate
68.
Effects - Image Effects -
Offset
69.
Layers - Duplicate
Image -
Flip
70.
Effects
- Image Effects - Offset
Your work looks like this now
71.
Color
Palette: Set your Foregroundcolor back to color and change to
#000000
Image - Add
Borders - Symmetric checked - 1 px - Foregroundcolor
72. Selections - Select
All
73.
Image
- Add Borders - Symmetric checked – 50 px - Backgroundcolor
74.
Selections
- Invert
75.
Selections
- Promote Selection to Layer
76.
Selections
- Select None
77.
Effects
3D Effects - DropShadow - Color - #000000
78. Effects - Plugins – Mura’s
Meister – Perspective Tiling
79.
Image - Flip
80.Image - Resize –
80% - Resize all layers not checked
81.
Effects - Image Effects -
Offset
82. Effects - -
Plugins – Eye candy 5 impact – Extrude - Settings Tab -
Preset MDlessen-Daisy extrude
83.
Selections - Load/Save Selection - Load
Selection From Disk -
MDlessen-selectie124
84.
Layers - New Raster
Layer
85.
Color
Palette - Change your Foregroundcolor to #00edf3  and your Backgroundcolor to #000000
Set your Foregroundcolor to
Foreground/Background Gradient
(Corel_06_029) - Style:
Linear
Fill the
Selection with the Gradient
86.
Effects - Texture Effects - Texture
- Canvas Fine (Corel_15_014)
87.
Selections
- Modify - Select Selection Borders
88.
Fill the Selection with the
Backgroundcolor (Right Mouse Click)
89.
Selections
- Select None
90. Layers -
Merge - Merge Down
91.
Image - Resize –60% - Resize all layers not
checked
92.
Effects - Image Effects -
Offset
93.
Open Tube deco 1 Daisy
MD
Edit -
Copy
On your work
image: Edit - Paste As New Layer
94.
Image - Resize – 90% - Resize all layers not
checked
95.
Effects - Image Effects -
Offset
96.
Layers - Duplicate
97.
Image
- Resize – 80% - Resize all layers not checked
98.
Effects - Image
Effects - Offset
99.
Selections - Load/Save Selection - Load
Selection From Disk -
MDlessen-selectie123
100.
Layers - New Raster
Layer
101.
Fill
the Selection with the Backgroundcolor
102.
Selections
- Select None
103.
Effects
- Distortion Effects - Wave
104.
Layers - Duplicate
Image -
Mirror
105. Image -
Resize – 80% - Resize all layers not
checked
106.
Mover Tool  Move the two flower stems on the vases like
this
Move the two flower stems on the vases like
this
107.
Layers - New Raster
Layer
108. Effects -
Plugins – Eye candy 5 Impact – Super Star - Settings Tab
Preset MDlessen-daisy bloem 1 (or use the flower 1 from the
materials and Paste as new Layer
Note If you want to change the color of the
flower click on the Colors Tab and on the colored
arrows
109.
Effects 3D Effects - DropShadow - Color -
#000000
110.
Layers - New Raster
Layer
111. Effects -
Plugins – Eye candy 5 Impact – Super Star - Settings Tab
Preset MDlessen-daisy bloem 2 (or use the flower 2 from the
materials and Paste as new Layer
112.
Effects 3D Effects - DropShadow -
Color - #000000
113.
Mover Tool Move the
flower on the stems
114.
Layers
- Merge - Merge all (Flatten)
115. Image - Add Borders - Symmetric
checked - Backgroundcolor - 1 px
Image - Add
Borders - Symmetric checked - Foregroundcolor – 4 px
Image - Add
Borders - Symmetric checked - Backgroundcolor - 1 px
116.
Selections
- Select All
117.
Image
- Add Borders - Symmetric checked - Backgroundcolor – 50
px
118.
Selections
- Invert
119.
Selections
- Promote Selection to Layer
120. Layers -
New Raster Layer
121.
Color Palette, Set your Foregroundcolor
back to Color #00edf3
Fill the Selection
with the Foregroundcolor
122.
Effects
- Texture Effects - Texture - Canvas Fine
(Corel_15_014)
123.
Layer Palette -
Double click on this Layer and set the Blend
Mode to
"Hard Light" and the Layer Opacity to
56
124. Selections - Select
None
125.
Layers
- Merge - Merge all (Flatten)
126.
Layers
- Duplicate
127. Image -
Resize – 90% - Resize all layers not checked
128. Layer Palette - Click on the Bottom
layer
Adjust - Blur - Gaussian Blur -
65
129. Layer Palette - Click on the Top
layer
Selections -
Select All
130.
Selections
- Modify - Contract – 20 px
131.
Selections
- Modify - Select Selection Borders
132. Layer Palette - Click on the Bottom
layer
Selections -
Promote Selection to Layer
133.
Selections
- Select None
134.
Effects
- Plugins – <I.C.NET Software> - Filters Unlimited 2.0 -
&<Bkg Designer sf10I> -
Cruncher
Repeat
once
135.
Layers -
Arrange - Bring to Top
136.
Effects
- Edge Effects - Enhance More
137.
Selections
- Select All
138.
Selections
- Modify - Contract – 20 px
139.
Effects
3D Effects - DropShadow - Color - #000000
140.
Effects - Edge Effects - Enhance
141. Selections - Select
None
142.
Layers
- Merge - Merge all (Flatten)
143.
Image - Resize - Width 900 Pixels -
Resize all layers checked
Attention: If you
skip step 143 the following steps will not be
right!
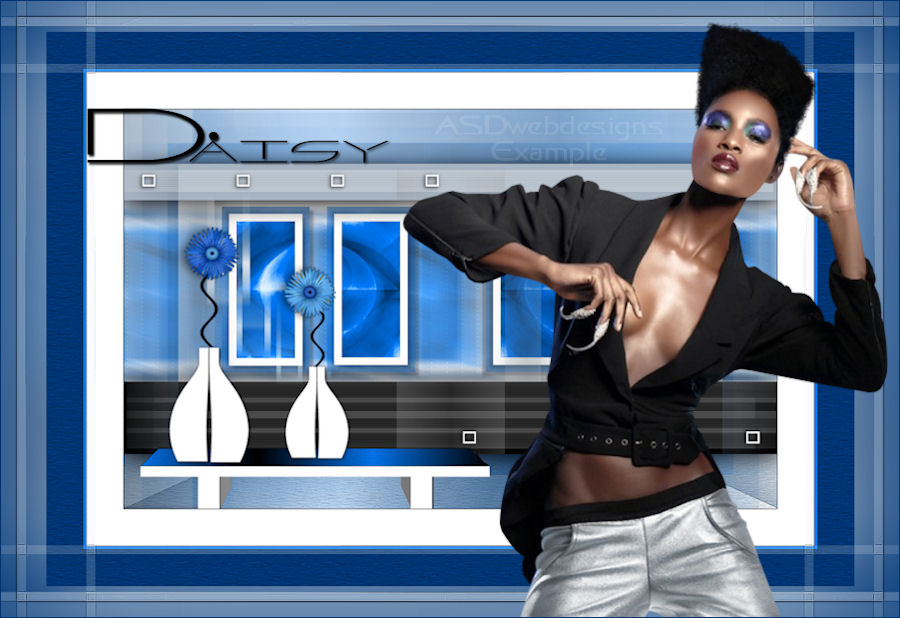
144.
Open
Tube womantubes220-HaZaL
Edit -
Copy
On your work
image: Edit - Paste As New Layer
145.
Image - Resize – 68% - Resize all layers not
checked
146.
Effects - Image Effects - Offset
147.
Effects 3D Effects - DropShadow -
Color - #000000
148.
Open Tube Tekst Daisy
MD
Edit -
Copy
On your work
image: Edit - Paste As New Layer
149.
Image - Resize – 70% - Resize all layers not
checked
150.
Effects - Image Effects -
Offset
151.
Layers - New Raster
Layer
Add your name or
watermark
152.
Image - Add Borders - Symmetric checked
- Backgroundcolor - 1 px
153.
Image - Resize - Width 900 Pixels -
Resize all layers checked
154.
Save as JPG file and you're
done!
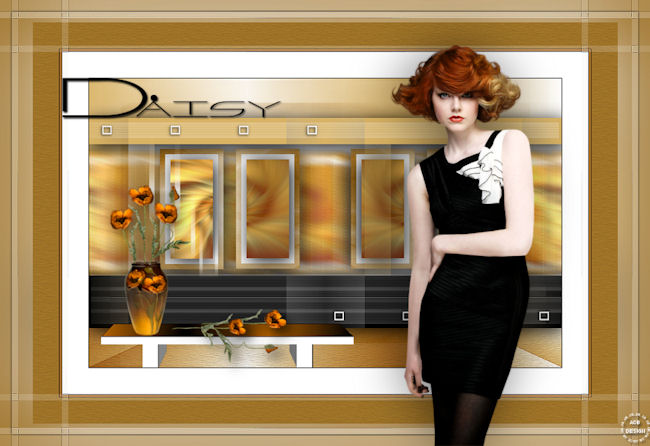
If you wish you
can post your result on my Facebook Page 
Attention
If you wish you can send your result to Monaiekje, she will
place it at her site. But only of your work is 900 PX
Width
Email
monaiekje.design@gmail.com
Extra Example
Tube by Annelies from A&K Tubes
unlimited. She shares her great tubes HERE
With special
thanks to my testers, this is what they
made:
Martalip:
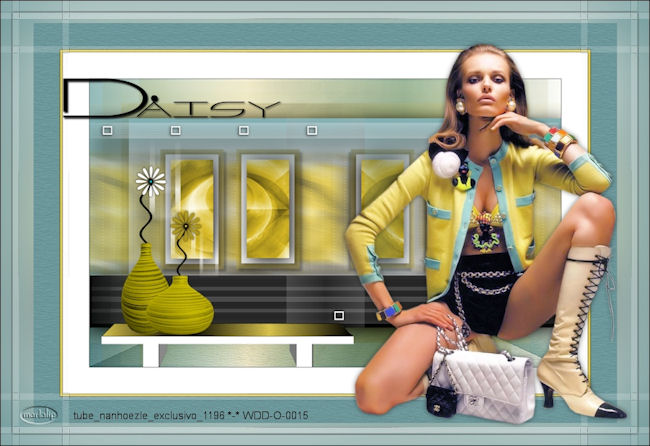
Chris:
Back to the top


