~°~°~°~°~
01.
Open a new
White image of 900 x 600 px
Layers
- New Raster Layer
Set your Foregroundcolor to
Foreground/Background Gradient
(Corel_06_029) - Style: Linear - Angle
45 - Repeats 25 -
Invert not checked
Fill your image
with the gradient
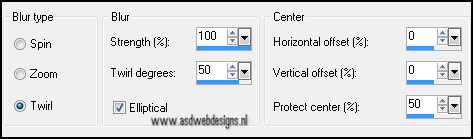
Adjust - Blur -
Radial Blur
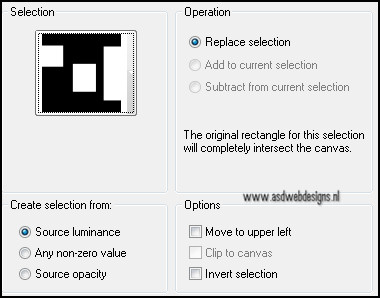
Selections -
Load/Save Selection - Load Selection From Disk -
MDlessen-selectie64
Hit the delete key
of your keyboard
Selections -
Select None
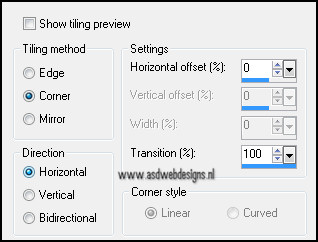
Effects - Image
Effects - Seamless Tiling
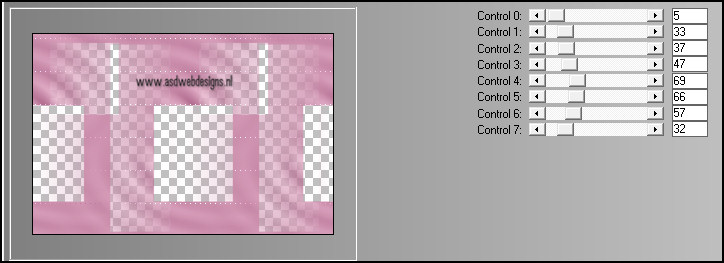
Effects -
Plugins – L and K landksiteofwonders – L & K’s
zitah
02.
Layers - New
Raster Layer
Selections -
Load/Save Selection - Load Selection From Disk - again
MDlessen-selectie64
Fill the selection
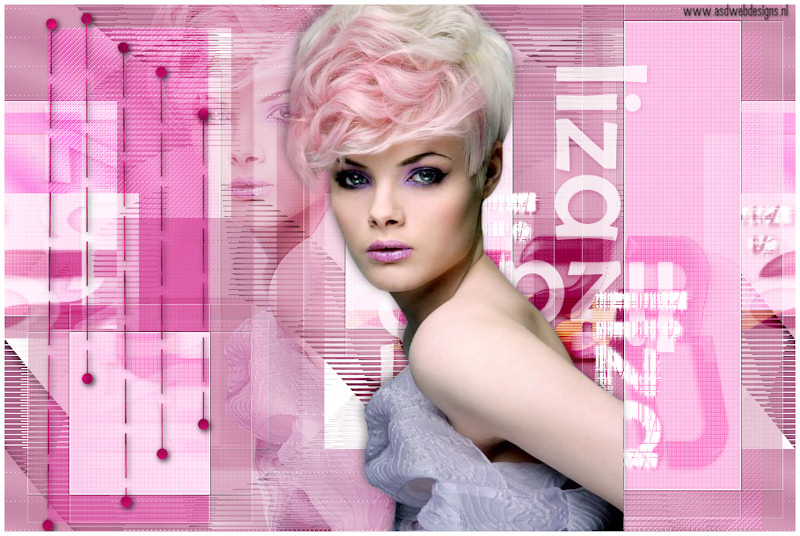
with the backgroundcolor #ad6187
Keep
selected!
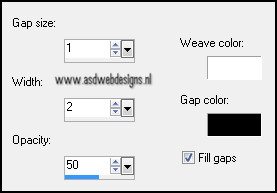
Effects - Texture
Effects - Weave - Weave Color #ffffff - Gap Color
#000000
Layer Palette - Set the Blend Mode of
this layer to "Overlay"
Keep
selected!
03.
Layers - New
Raster Layer
Fill the selection
with the foregroundcolor #fdcde4
Selections -
Select None
Image -
Flip
Effects -
Plugins – it@lian editors effect – effetto
fantasma
Effects - Edge
Effects - Enhance
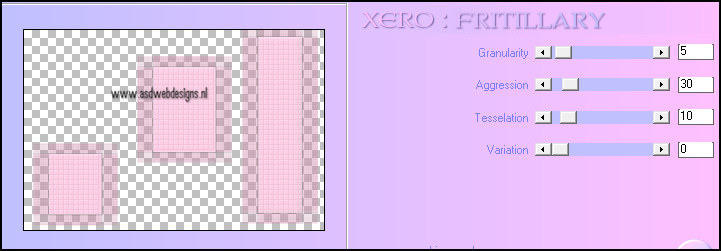
Effects -
Plugins – xero – Fritillary
Layers -
Duplicate
Image -
Mirror
Image - Resize -
80% - Resize all layers not checked
Layer Palette - Set the Blend Mode of this layer to
"Multiply"
Effects - Image
Effects - Seamless Tiling - Same settings as before
Layers - Arrange -
Move Down
04.
Layer Palette - Click on the top
layer
Selections -
Load/Save Selection - Load Selection From Disk -
MDlessen-selectie65 - Same settings as before
Selections -
Promote Selection to Layer
Open Wordart Tube
"tekst - Liza MD" - Edit -
Copy
On your work
image - Edit - Paste Into
Selection
Selections - Select
None
Effects - Image
Effects - Seamless Tiling - Same settings as before
Layer Palette - Set the Blend Mode of this layer to
"Overlay"
05.
Selections -
Load/Save Selection - Load Selection From Disk -
MDlessen-selectie66 - Same settings as before
Layer Palette - Click on the Third
layer from the top
Selections -
Promote Selection to Layer
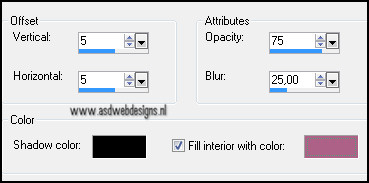
Effects 3D
Effects - Cutout - Shadow color #00000 - Interior color
#ad6187
Selections -
Select None
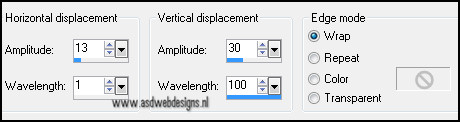
Effects - Distortion Effects - Wave
Effects -
Image Effects - Seamless Tiling - Same settings as
before
06.
Layer Palette - Click on the top
layer
Edit - Paste as
New Layer ( The text is still in your PSP Memory)
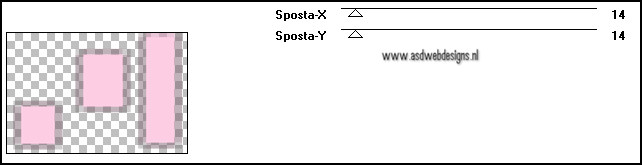
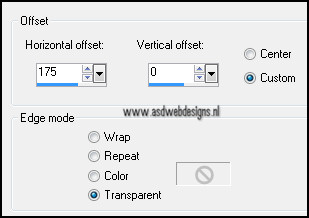
Effects - Image
Effects - Offset
Layer Palette - Set the
Blend Mode of this layer to "Screen"
Layers -
Duplicate
Layer Palette - Set the Blend Mode of this layer to
"Overlay"
07.
Open Tube "Liza tube 317"
Edit -
Copy
Edit - Paste as
New Layer
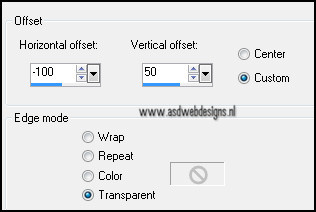
Effects - Image
Effects - Offset
Layer Palette - Set the Blend Mode of this layer to
"Soft Light"
Adjust - Sharpness
- Sharpen More
08.
Layers - New
Raster Layer
Selections -
Load/Save Selection - Load Selection From Disk -
MDlessen-selectie67 - Same settings as before
Fill the selection
with the backgroundcolor #ad6187
Layer Palette - Set the Blend Mode of this layer to
"Overlay"
Selections -
Select None
09.
Edit - Paste as
New Layer (Liza tube is still in your PSP Memory)
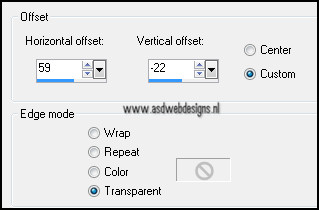
Effects - Image
Effects - Offset
Effects 3D
Effects - Dropshadow - Minus 3 - Minus 3 - 45 - 15 -
#000000
10.
Set your
forgroundcolor to #ffffff
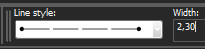
Pen Tool  - Mode:
Draw Lines and Poly Lines -
Create as Vector checked -
Linestyle lijnstijl monaiekje
1-
Width 2.30
- Mode:
Draw Lines and Poly Lines -
Create as Vector checked -
Linestyle lijnstijl monaiekje
1-
Width 2.30
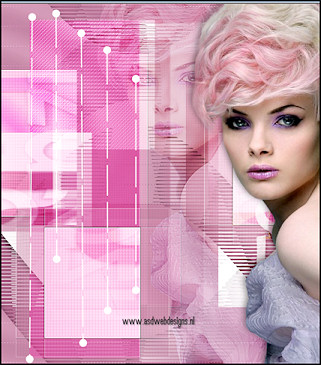
Draw lines as in
the example ( Hold down the shift Key of your keyboard to get a
straight line)
Layers - Convert
to Raster Layer
Effects -
Plugins – Eye Candy 5 Impact – Brushed Metal -
Settings Tab - User Settings - Preset MDlessen-Liza
EC5impact
Note: If you are
using different colors you can change the Metal color at
the Basic Tab
Effects 3D
Effects - Dropshadow - 2 - 2 - 85 - 10 -
#000000
11.
Image - Add
Borders - Symmetric checked - 5 px -
#ffffff
Image - Resize - Width
800 Pixels - Resize all layers
checked