The tutorial:
01
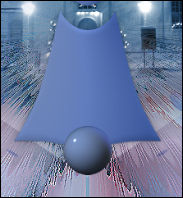
Open a new
transparent image of 900 x 600 px
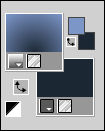
Fill with the
Gradient 
Selections - Select
All
Maximize Tube"sassyillusions_gothicbeauty0" from
tray
Edit - Copy
On your work image: Edit - Paste
Into Selection
Selections - Select
None
Effects -
Image Effects - Seamless Tiling
- Default
settings
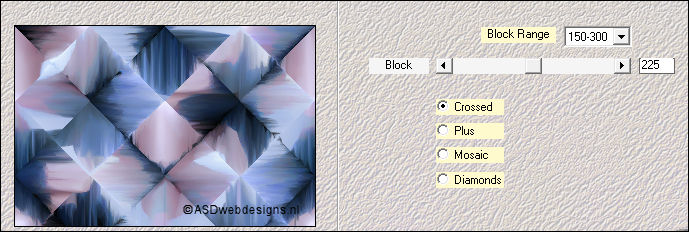
Effects - Plugins -
Mehdi - Sorting Tiles
02
Layers - Duplicate
Effects - Plugins - <I.C.NET
Software> - Filters
Unlimited 2.0 -&<BKg Designer
sf10 II> -
PLAB10 Sharpened PencilX

Layer Palette -
Double click on this Layer and
set
the Opacity of this Layer to
50
Layers - Merge - Merge Visible
03
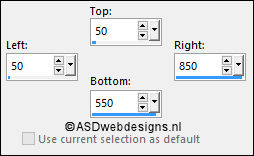
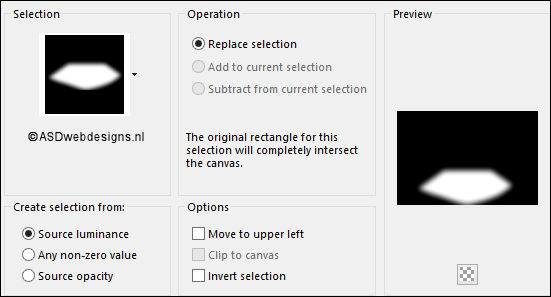
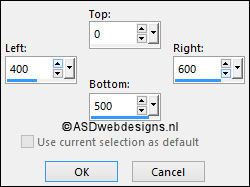
Selection
Tool - Rectangle  - Custom Selection:
Selections -
Promote Selection to Layer
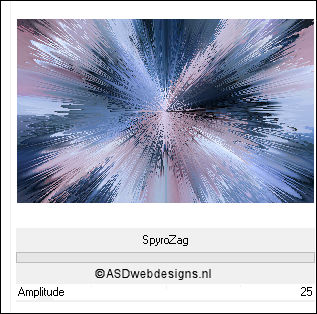
Effects - Plugins - <I.C.NET
Software> - Filters
Unlimited 2.0 -&<BKg Designer
sf10 III> -
SpyroZag
Effects - Edge Effects -
Enhance
Selections - Select None
Layers - Merge - Merge
Visible
Your work looks like this
now:

04
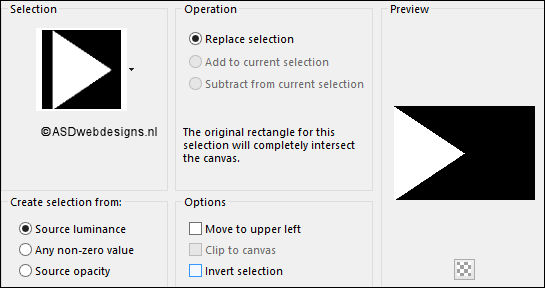
Layers - New Raster Layer
Selections - Load/Save Selection -
Load Selection From Disk -
Msb_Sel_Christmas_2012_01
Fill the Selection
with the Gradient
Selections - Select None
Layers - Duplicate
Image - Mirror - Mirror
Horizontal
Layers - Merge - Merge
Down
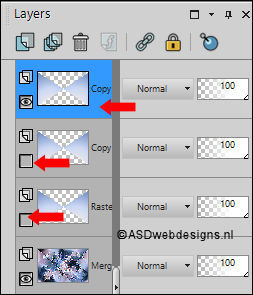
05
Layers - Duplicate
Edit - Repeat Duplicate
Layer
Close the Two middle Layers by
clicking in the Little Eye
The top layer is the active
layer
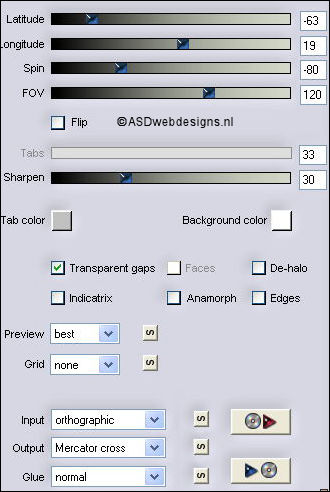
06
Effects - Plugins - Flaming Pear -
Flexify 2 - Click on the Red
Arrow  and load Preset
Msb_Preset_Flexify_Christmas_2012
and load Preset
Msb_Preset_Flexify_Christmas_2012
Or if this is not working for you
with these settings:
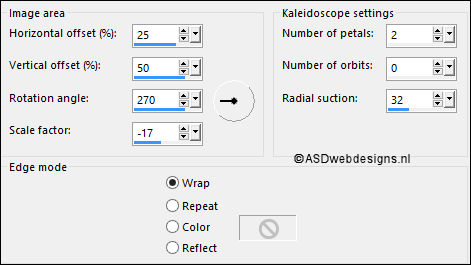
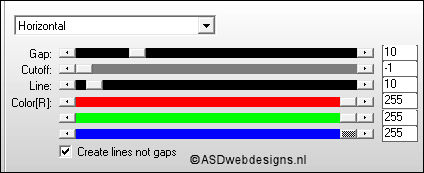
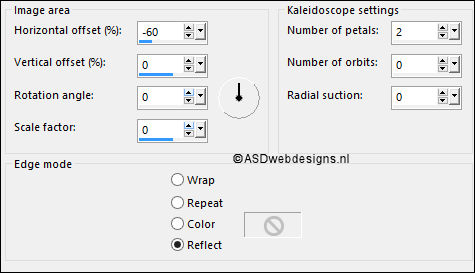
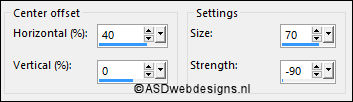
Effects -
Reflection Effects - Kaleidoscope
Effects - 3D Effects - Drop Shadow
- Vertical 0 - Horizontal 0 -
Opacity 20 - Blur 50 - Color
#000000 
Layer Palette -
Double click on this Layer and set the Blend Mode
to
"Multiply"
Layers - Arrange - Move
Down
Edit Repeat Arrange
Layer
07
Layer Palette - Click
on the Top Layer (Copy of Raster 1) and
open it
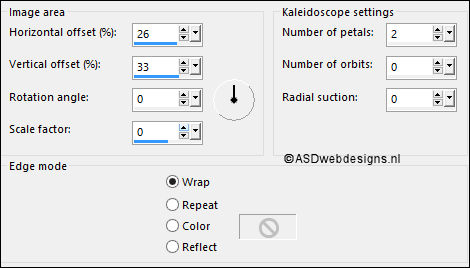
Effects -
Reflection Effects - Kaleidoscope
Effects -
Plugins - AP [Lines] - Lines - SilverLining
Effects - 3D Effects - Drop Shadow
- Vertical 0 - Horizontal 0 -
Opacity 25 - Blur 50 - Color
#000000
Layer Palette -
Double click on this Layer and set the Blend Mode
to "Soft
Light"
Layers - Arrange - Move
Down
Edit Repeat Arrange
Layer
08
Layer Palette - Click
on the Top Layer ( Raster 1) and open
it
Effects -
Reflection Effects - Kaleidoscope
Effects - 3D Effects - Drop Shadow
- Vertical 0 - Horizontal 0 -
Opacity 80 - Blur 50 - Color
#000000
Layer Palette -
Double click on this Layer and set the Blend Mode
to "Soft
Light"
Layers - Arrange - Move
Down
Edit Repeat Arrange
Layer
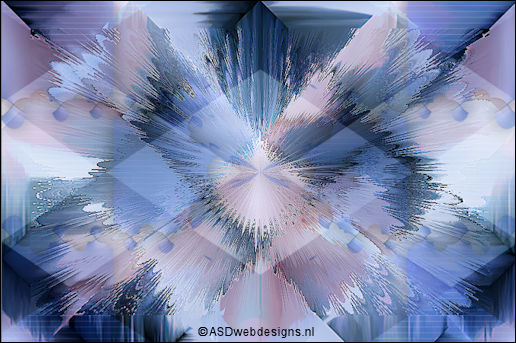
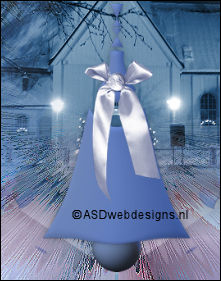
Result
09
Layers - New Raster Layer
Selections - Load/Save Selection -
Load Selection From Disk - Msb_Sel_
Christmas_2012_02
Fill the
Selection with the Gradient
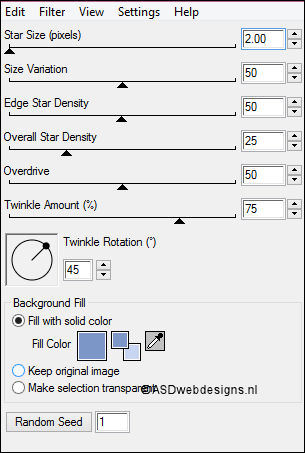
Effects -
Plugins - Alien Skin - Xenofex 2 -
Constellation -
Snowflakes
Selections - Select None
Effects - 3D Effects - Drop Shadow
- Vertical 0 - Horizontal 0 -
Opacity 80 - Blur 50 - Color
#000000
10
Layer Palette
- Click on the Top Layer
Maximize Tube
"daant.christmashouse" from
tray
Edit - Copy
On your work image:
Edit - Paste As New Layer
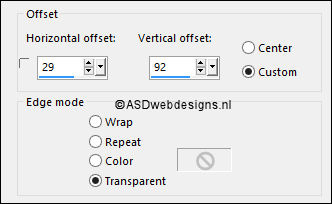
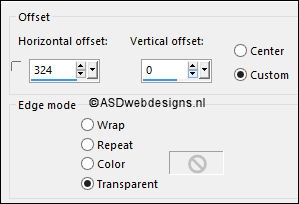
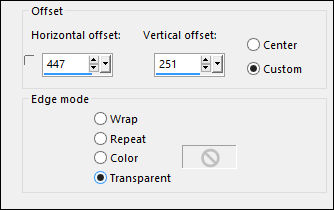
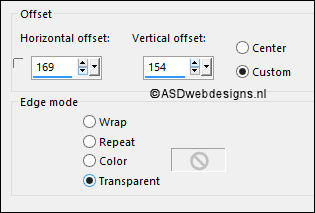
Effects - Image Effects -
Offset
Effects -
Plugins - Adjust - Variations - Click once on
"Original"- Click twice on "Darker"
Adjust
- Sharpness - Sharpen
11
Layers - New Raster Layer
Selections - Load/Save Selection -
Load Selection From Disk - Msb_Sel_
Christmas_2012_01
Fill the
Selection with the Gradient
Selections - Select None
Layers - Duplicate
Image - Mirror - Mirror
Horizontal
Layers - Merge - Merge
Down
Image -
Resize - 60% - Resize all Layers not
checked
Image - Free
Rotate - Right checked - 90° -
Both boxes
unchecked
12
Effects -
Distortion Effects - Warp
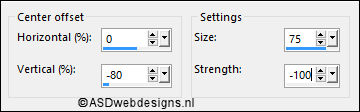
Image -
Resize - 50% - Resize all Layers not
checked
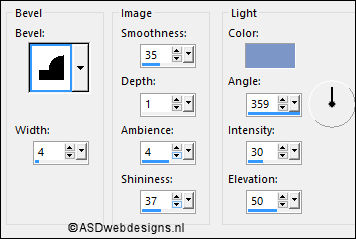
Effects - 3D
Effects - Inner Bevel - Color #7c96c8

13
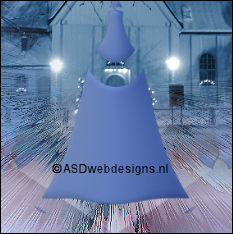
Mesh Warp Tool 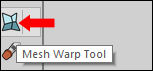

Pull the
Middle node a little bit down so you
get an round
bottom:


Hit any key on
your keyboard to close the Mesh
Tool
Effects - 3D Effects - Drop Shadow
- Vertical 0 - Horizontal 0 -
Opacity 30 - Blur 15 - Color
#000000
14
Color Palette: Set the Foreground
Gradient back to color
Layers - New Raster Layer
Fill with the
Foregroundcolor
Effects - Plugins - Flaming Pear -
Flexify 2 - Click on the Red
Arrow and load Preset
Msb_Preset_Flexify_Christmas_2012_01
Or if this is not working for you
with these settings:
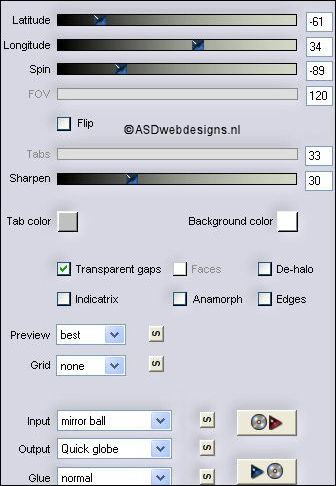
Image -
Resize - 10% - Resize all Layers not
checked
Move like
this:
Layers - Arrange - Move
Down
Layer Palette
- Click on the Top Layer
Layers - Merge - Merge
Down
15
Maximize Tube
"strikje
1" from
tray
Edit - Copy
On your work image:
Edit - Paste As New
Layer
Move like this:
Adjust - Sharpness -
Sharpen
Effects - 3D Effects - Drop Shadow
- Vertical 0 - Horizontal 0 -
Opacity 30 - Blur 15 - Color
#000000
Layers - Merge - Merge
Down
16
Edit -
Cut ( do not copy)
Edit -
Paste As New Image
Minimize
to tray, you need it later ( save
also as PSP file in case PSP shuts
down on you or you need a break)
17
Go back
to your work Image
Layers - New Raster Layer
Selections - Load/Save Selection -
Load Selection From Disk -
Msb_Sel_ Christmas_2012_03
Fill with the Foregroundcolor
Effects - Plugins - Alien Skin Eye Candy
5 Nature - Settings Tab Preset
Msb_Christmas_2012_01
Selections
- Select None
18
Color Palette: Set your Foregroundcolor to
Foreground/Background Gradient (Corel_06_029) -
Style: Sunburst4


Layers
- New Raster Layer
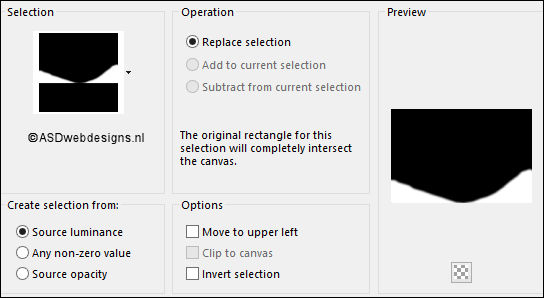
Selection Tool - Rectangle
- Custom Selection:
Fill with the Gradient

Selections - Select None
Effects - Plugins - It@lian Editors
Effect - Effetto Fantasma - Sposta-
X 31 - Sposta Y
255
Effects - Distortion Effects -
Warp
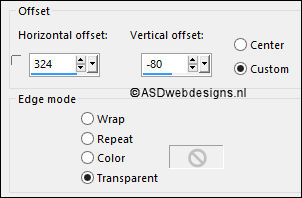
Effects - Image Effects - Offset
19
Layers - Duplicate
Image - Mirror - Mirror Horizontal
Layers - Merge - Merge Down
Layer Palette -
Double click on this Layer and set the Blend Mode to
"Multiply"
20
Layers - New Raster Layer
Selections - Load/Save Selection - Load
Selection From Disk - Msb_Sel_
Christmas_2012_04
Effects - 3D Effects - Drop Shadow
- Vertical 0 - Horizontal 0 -
Opacity 70 - Blur 50 - Color
#1d2835 
Selections - Select None
21
Maximize Tube
"Snoeflake_tree2" from
tray
Edit - Copy
On your work image:
Edit - Paste As New
Layer
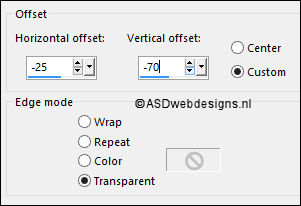
Effects - Image Effects - Offset
Adjust - Sharpness - Sharpen
Effects -
Plugins - Adjust - Variations - Click once on
"Original"- Click once on "More Blue" - and once on
"Lighter"
Effects - 3D Effects - Drop Shadow
- Vertical 0 - Horizontal 0 -
Opacity 70 - Blur 50 - Color
#1d2835
22
Layers - Duplicate
Image -
Resize - 80% - Resize all Layers not
checked
Effects - Image Effects - Offset
Adjust -
Sharpness - Sharpen
23
Layer Palette
- Click on the Bottom Layer
Image - Canvas
Size
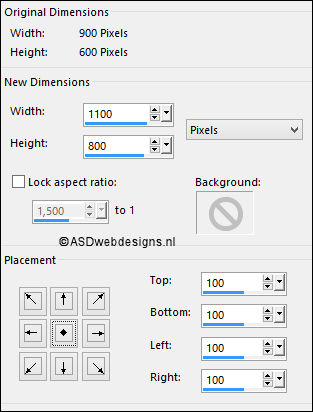
Color Palette: Change
the Backgroundcolor to #1d2835
Layers - New Raster Layer
Layers -
Arrange - Send to Bottom
Fill with the
Backgroundcolor
Layer Palette -
Double click on this Layer and set the Blend Mode to "Soft
Light" and the Layer Opacity to
55
Edit - Copy - Copy Merged
24
Maximize Tube"Msb_Frame_Christmas_2012_02" from
tray
Window - Duplicate (or
shift+D) - Close the original and proceed on the
copy
Layers - New Raster Layer
Fill with the Foreground Gradient
Layers - Arrange - Move Down
Edit - Paste As New Layer (Your
Image is still in your PSP Memory)
25
Layer Palette - Click on the Top
Layer
Maximize The
Bell Image you have minimized
in
step 16 from tray 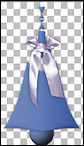
Edit - Copy
On your work image:
Edit - Paste As New
Layer
Effects - Image Effects -
Offset
Layers - Duplicate
Image - Mirror - Mirror
Horizontal
26
Maximize Tube
"sassyillusions_gothicbeauty0" from
tray
Edit - Copy
On your work image:
Edit - Paste As New
Layer
Move like this:

Adjust - Sharpness - Sharpen
Effects - 3D Effects - Drop
Shadow - Vertical 0 -
Horizontal 0 - Opacity 70 -
Blur 50 - Color #1d2835
27
Maximize Tube
"Msb_Text_Christmas_2012-1" from
tray
Edit - Copy
On your work image:
Edit - Paste As New
Layer
Effects - Image Effects
- Offset
28
Image - Add Borders - Symmetric
checked - 1 px - #1d2835
Image - Resize - Width 900
Pixels - Resize all Layers checked
Add your name or
watermark, save as JPG file and you're
done!


